
Discover a whole new world in miniature! Sit down in a field, or near a pond and start looking at your immediate surrounding in a whole new way. Get close and think of framing a much smaller image. Look for things about 1/4 inch in size. You may be surprised what you find. Then use macro extension tubes, filters or lens to photograph things close up and personal!
Google it: Examples of macro photography
Equipment
Tripod is helpful in low light, because macro tubes cut down on your light
Adobe Photoshop or Lightroom for appropriate adjustments (exposure, color, sharpness).
Overview
• 2 macro images without water drops
• 2 macro images of water drops with fruit, veggies or flowers
• 1 8x12, mounted print
Instructions
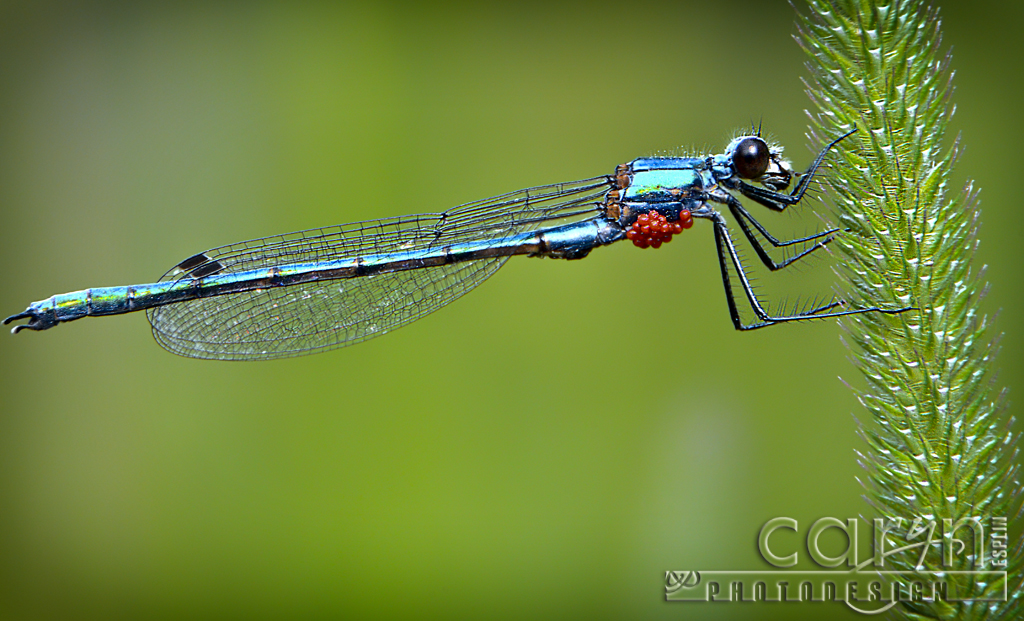
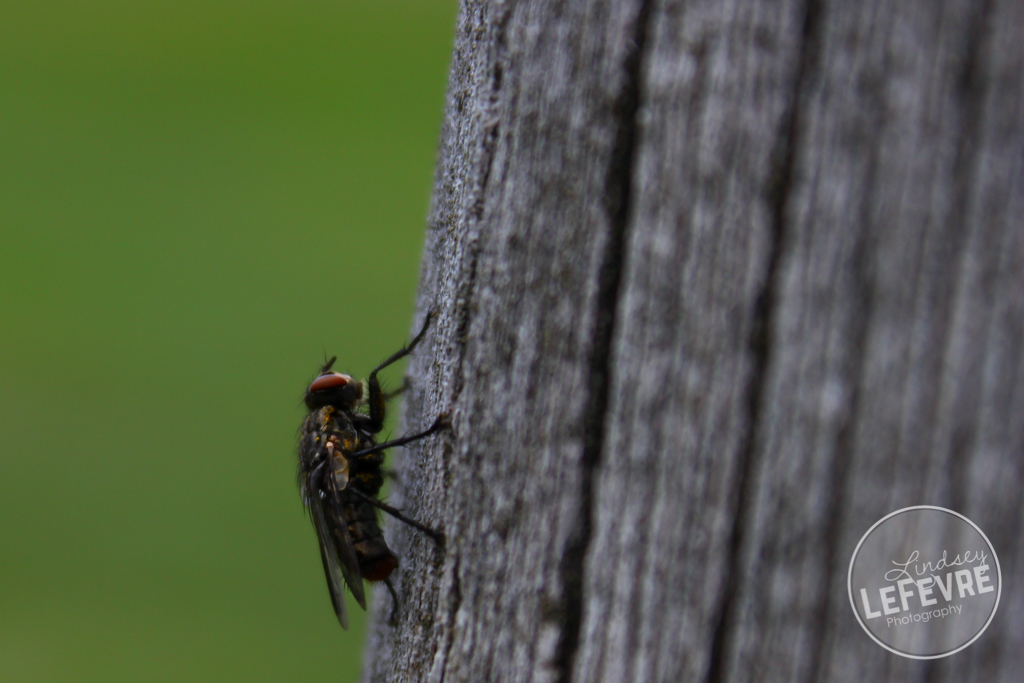
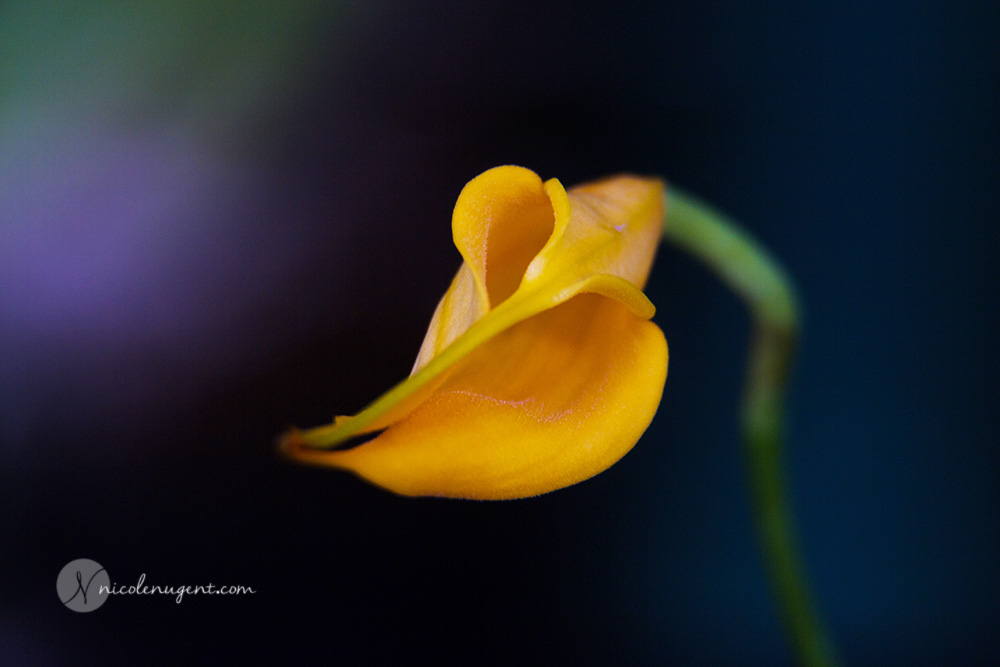
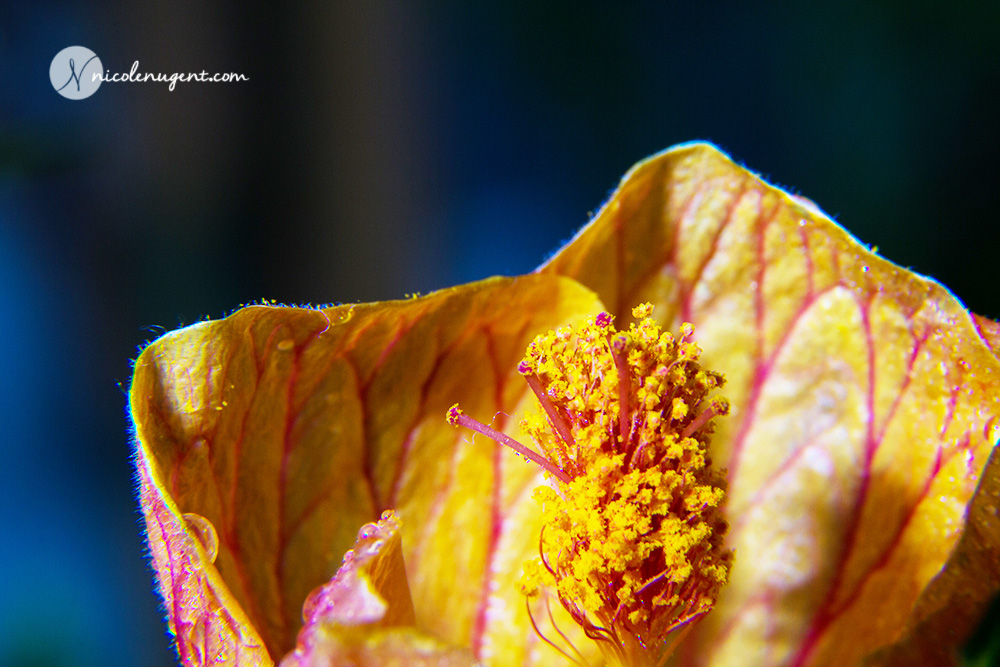
1. CLOSE UP: Use Macro tubes or close-up filters to capture at least 2 macro images of varied subjects (without water drops)
VARIETY & CREATIVITY! Remember that variety is important! Be sure your images are not of the same subject, in the same area or lighting conditions.
Follow this MACRO EXTENSION TUBES TUTORIAL (or close-up filters) to convert a zoom lens (such as the 18-135, 55-250, 70-200) to a macro lens, which enables you to get very close to your subject. Use manual focus and zoom to bring very small objects into view. Be sure your focal point is sharp.
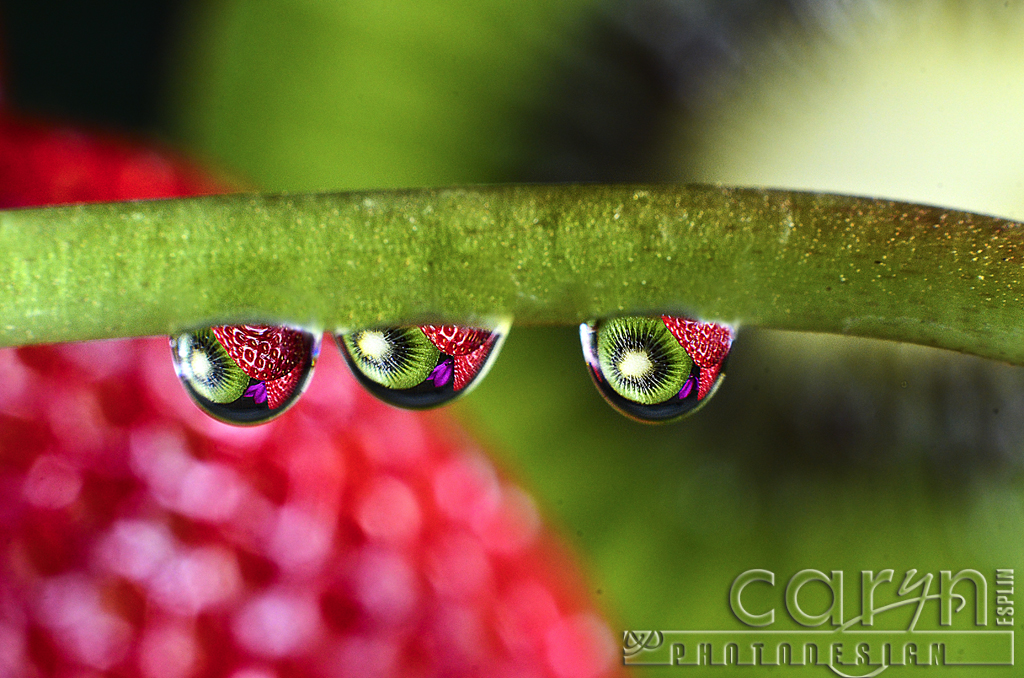
2. WATER DROPS: Use Macro tubes or close-up filters to capture at least 2 macro images of water drops with fruit, veggies or flowers
VARIETY & CREATIVITY! Remember that variety is important. Be sure your images are not of the same subject in the same area or lighting conditions. Follow this MACRO WATER DROP TUTORIAL by Megan Kelly, to use water drops with macro photography. Be sure the water drop is sharp! Though it is not required, try to get something to show up inside your water drop. A well placed water drop becomes a mini fisheye lens that reflects its background, flipped.
3. PRINT AN 8X12 MOUNTED MACRO IMAGES: You will be required to bring your final conceptual image printed and mounted on foam core at the start of class. Follow this link to learn more about preparing your final image for printing.
Submission:
-Do not submit until everything is complete. Once you submit, be sure NOT to change anything on your post, until after it is graded. Follow the Submission Instructions
-Submit blog post link to the WEB URL tab on Canvas.
-Before 9am Wednesday, choose your best photo (only one) from this project and add it to the correct Class Facebook album. NOTE: Go to Photos > Albums -- in the left upper column of the FB Group.
Macro Tips
EQUIPMENT: Zoom lens (70-100mm) – Tubes/Filters – LED Lights (Flash)
SETTINGS: LED: 1/125 – 1/160 – FLASH: 1/60 – 1/250 ISO: 400 +/- APERTURE: F/8 – F/16
ZMF – ZMF: Zoom to 75+ – Move camera in and out…Manual Focus
Then- Repeat…ZMF to fine tune the focus… ZMF-ZMF.
Rubric
NOTE: Meeting the minimum requirements is “average” and constitutes an 80% or B- grade, according to the University Grading Guide. To receive a higher grade, students should excel. However, quality and/or difficulty is more important than quantity.
√ SIZING: Photos sized to 1080 pixels on the long side. First part of jpeg filename is student’s name. Example: JakeSpencer-Tetons.jpg. Photos displayed at “Large” size in blog post, per instructions in Week 1 > Photo Blog Instructions. Photos are clickable.
√ PROCESS: Detailed paragraph (3-5 sentences) about the process
√ INSTRUCTIONS: 2+ new macro photos with sharp focal point; 2+ new macro photos with sharp water drop on fruit, veggies, or flowers.
√ PHOTO QUALITY: Light – Focus – Composition – Creativity
√ APPROPRIATE EDITS for professional display
√ SUBMISSION: Link submitted was a true hyperlink and linked directly to the completed blog post. Best photo in FB before 9am on Wednesday.
CAUTION: YOUR ASSIGNMENT IS NOT COMPLETE UNTIL YOU SUBMIT A LINK TO IT HERE. However, you are allowed a one-time extension, if you choose to use your mulligan. Please read about it in the syllabus. We check your blog post for completion right at the deadline, so please do not add things later. Everything needs to be complete when you post the link.
Advanced Options, Tips & Tutorials
Google the following topics to find inspirational examples, tutorials and videos.
Attend Visual Society meetings to learn more advanced options and get inspired!
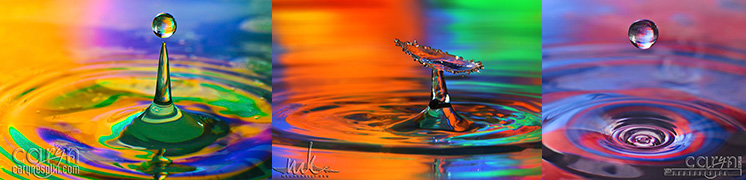
FREEZE – SPLASHING WATER DROPS: Follow this tutorial. Use a tripod, macro tubes and flash in the dark to freeze a water droplet as it splashes into a glass dish of water. (Also, Google “water drop photography”)