Final Photobook Blog Post & Eval Form
NOTE: This FINAL PDF MUST MATCH YOUR PRINTED PHOTOBOOK. The book content in this PDF will be graded and compared to the final printed photobook.
- Write two nice paragraphs in your post about your final photobook.
- Upload a JPEG of your cover at the start of your post and link your PDF file to that.
- Also add a text link to your photobook PDF.
- Be sure your file is under 5 MB in file size.
- Make sure your pages are set to two-page spreads so it looks exactly like your printed book, without the bleeds.
- Split your front cover design from your back cover design (see below) so they can be placed in the proper position. Include the front cover image at the start of the PDF and the back cover at the end. Viewing your final, completed PDF in this blog post, should show your book just as you would look at the printed version. CHECK THE SAMPLE POST ABOVE!
Tips to separate your front cover and back cover designs and merge your cover and book PDF files:
2. BOOK CONTENT: Export your content pages as another PDF as spreads. Be sure to Uncheck the bleed settings of your InDesign file. (also in Smallest File Size). Name the file descriptively. Example: photobook-content.pdf
3. MERGE FRONT COVER, BOOK CONTENT AND BACK COVER: Use Adobe Acrobat Pro or PDFMerge to combine all three PDFs: your front cover PDF, book PDF, and back cover PDF. To use PDFMerge… go to pdfmerge.com and put your file in the correct order (your front cover on top, your content pages, then your back cover). Click on “Merge“. The website will automatically merge your PDF and download it to your computer.
NOTE: You may also Google how to combine PDFs in Adobe Acrobat Pro CC.
4. Rename the filename with your name. Example: YourName-photobook.pdf
5. Upload your pdf to your Media Library, then add a text link to the pdf and link the pdf to the jpeg of your front cover
SUBMISSION: Do not submit until everything is complete. Once you submit, be sure NOT to change anything on your post, until after it is graded. When your assignment is complete, click “Open” on this page and submit the following:
1. A phone photo of your completed eval form attached as a file on Canvas.
2. A screenshot of the 2nd Blurb email confirmation showing the order shipment confirmation.
3. A link to your blog post (not home or log-in page) in the comment section of Canvas.
Submit A Photo of your Completed Eval Form (5 points)
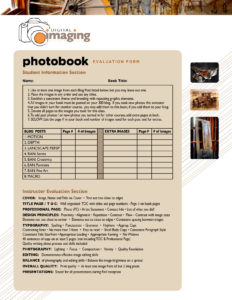
1. Print this Photobook Evaluation Form
2. Fill out the Evaluation Form
3. Take a phone photo of your form and submit it with this Photobook Blog Post Submission.
FOR FINAL CLASS: Photobook Presentation & Content (35 Points)
Present your photobook and stay for all classmates’ presentations during the final class. Casual dress and informal 2 minute presentation. We will pass around the photobooks while people present.
Congratulations on finishing your photobook! Woo-hoo
PLEASE NOTE: Regardless of your grade in the class, you will not get a passing grade in this class if you do not turn in this final project.
Pick Up Your Photobook
