What is OS-ES
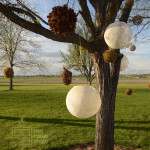
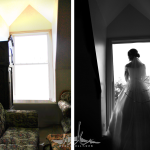
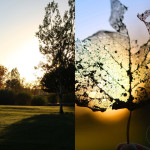
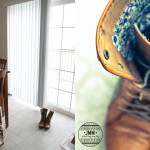
(Click images above to enlarge)
Roberto Valenzuela presented an inspirational approach to photography and shared his style at Photoshop World 2014. He talked about how we can find beauty in the ordinary, mundane situations. So naturally I had to come up with a rhyming acronym to describe and remember it. OS-ES is a process where you find an Ordinary Spot, most people would pass over, and create an Extraordinary Shot in that location. He claims you can create a masterpiece almost anywhere with a little creativity.
Instructions
Capture at least 2 good OS-ES pairs
1. Get creative – Think outside the box! Show two different approaches to this topic. Show the before (or ordinary location) and the extraordinary creation in that spot.
2. Blog Post: Add 4+ images (2 OS-ES pairs) to a blog post. Follow the Blog Post Guidelines
3. Instagram:
– Post at least one of your OS-ES images on Instagram. Use the #comm300 hashtag and tag@visualcomm.photos on the image not in the caption.
– Search the #comm300 hashtag and view 6+ classmates’ OS-ES posts.
– Leave comments on at least three classmates Insta – OS-ES posts
4. Submission:
– Follow the Submission Process
– List how many classmates’ Insta OS-ES Insta posts you viewed and who you commented on.
– Example: I viewed 6+ classmates OS-ES; Commented on Lindsey, Ben, and Doug.
CAUTION: Your assignment is not complete until you submit it here. However, you are allowed a one-time extension, if you choose to use your mulligan. (See syllabus). We check your blog post for completion right at the deadline, so please do not add things after submitting your link, until it has been graded. In accordance with Comm Dept. policy, late work will not be accepted.
Tutorials
Check out these OS-ES examples and tips by Megan Kelly.
Rubric
NOTE: Meeting the minimum requirements is “average” and constitutes an 80% or B- grade, according to the University Grading Guide. To receive a higher grade, students should excel. However, quality and/or difficulty is more important than quantity.
√ SIZING: Photos sized to 1024 pixels on the long side. First part of jpeg filename is student’s name. Example: JakeSpencer-Tetons.jpg. Photos displayed at “Large” size in blog post, per instructions in Week 1 > Photo Blog Instructions. Photos are clickable.
√ PROCESS: Detailed paragraph (3-5 sentences) about the process. List how you blended the texture image.
√ INSTRUCTIONS: 12 quality images of the same subject with completely different vantage points, angles, focal lengths, depth of field, and leading lines. Process all 12 using the tutorials from A4 Activity. Use one of your texture images to blend with a Perspective of 12 image. Post the original texture image too, even if it is a thumbnail. Post 3-7 of them large, and with the remaining images create a collage at 1024px width.
√ PHOTO QUALITY: Light – Focus – Composition – Creativity.
√ APPROPRIATE EDITS for professional display
√ SUBMISSION: Link submitted was a true hyperlink and linked directly to the completed blog post.
CAUTION: YOUR ASSIGNMENT IS NOT COMPLETE UNTIL YOU SUBMIT A LINK TO IT HERE. However, you are allowed a one-time extension, if you choose to use your mulligan. Please read about it in the syllabus. We check your blog post for completion right at the deadline, so please do not add things later. Everything needs to be complete when you post the link.


